
Basement Bathroom Remodel
With three kiddos, it seems like we’re constantly moving rooms to accommodate their growing needs. Six years ago when we moved in to our current home, the tiny spare bathroom in the basement was next to my office, and rarely used by anyone but me. It seemed very fitting for the only girl in the house, as it was adorned with a cream colored marble sink, gold fixtures and a baby blue tulip patterned vinyl floor. Fast forward 5 years and my ‘office’ has now been transformed into a teenage football lovin’ kids room. And that bathroom? It’s been taken over too. Needless to say, it was definitely time for a remodel.
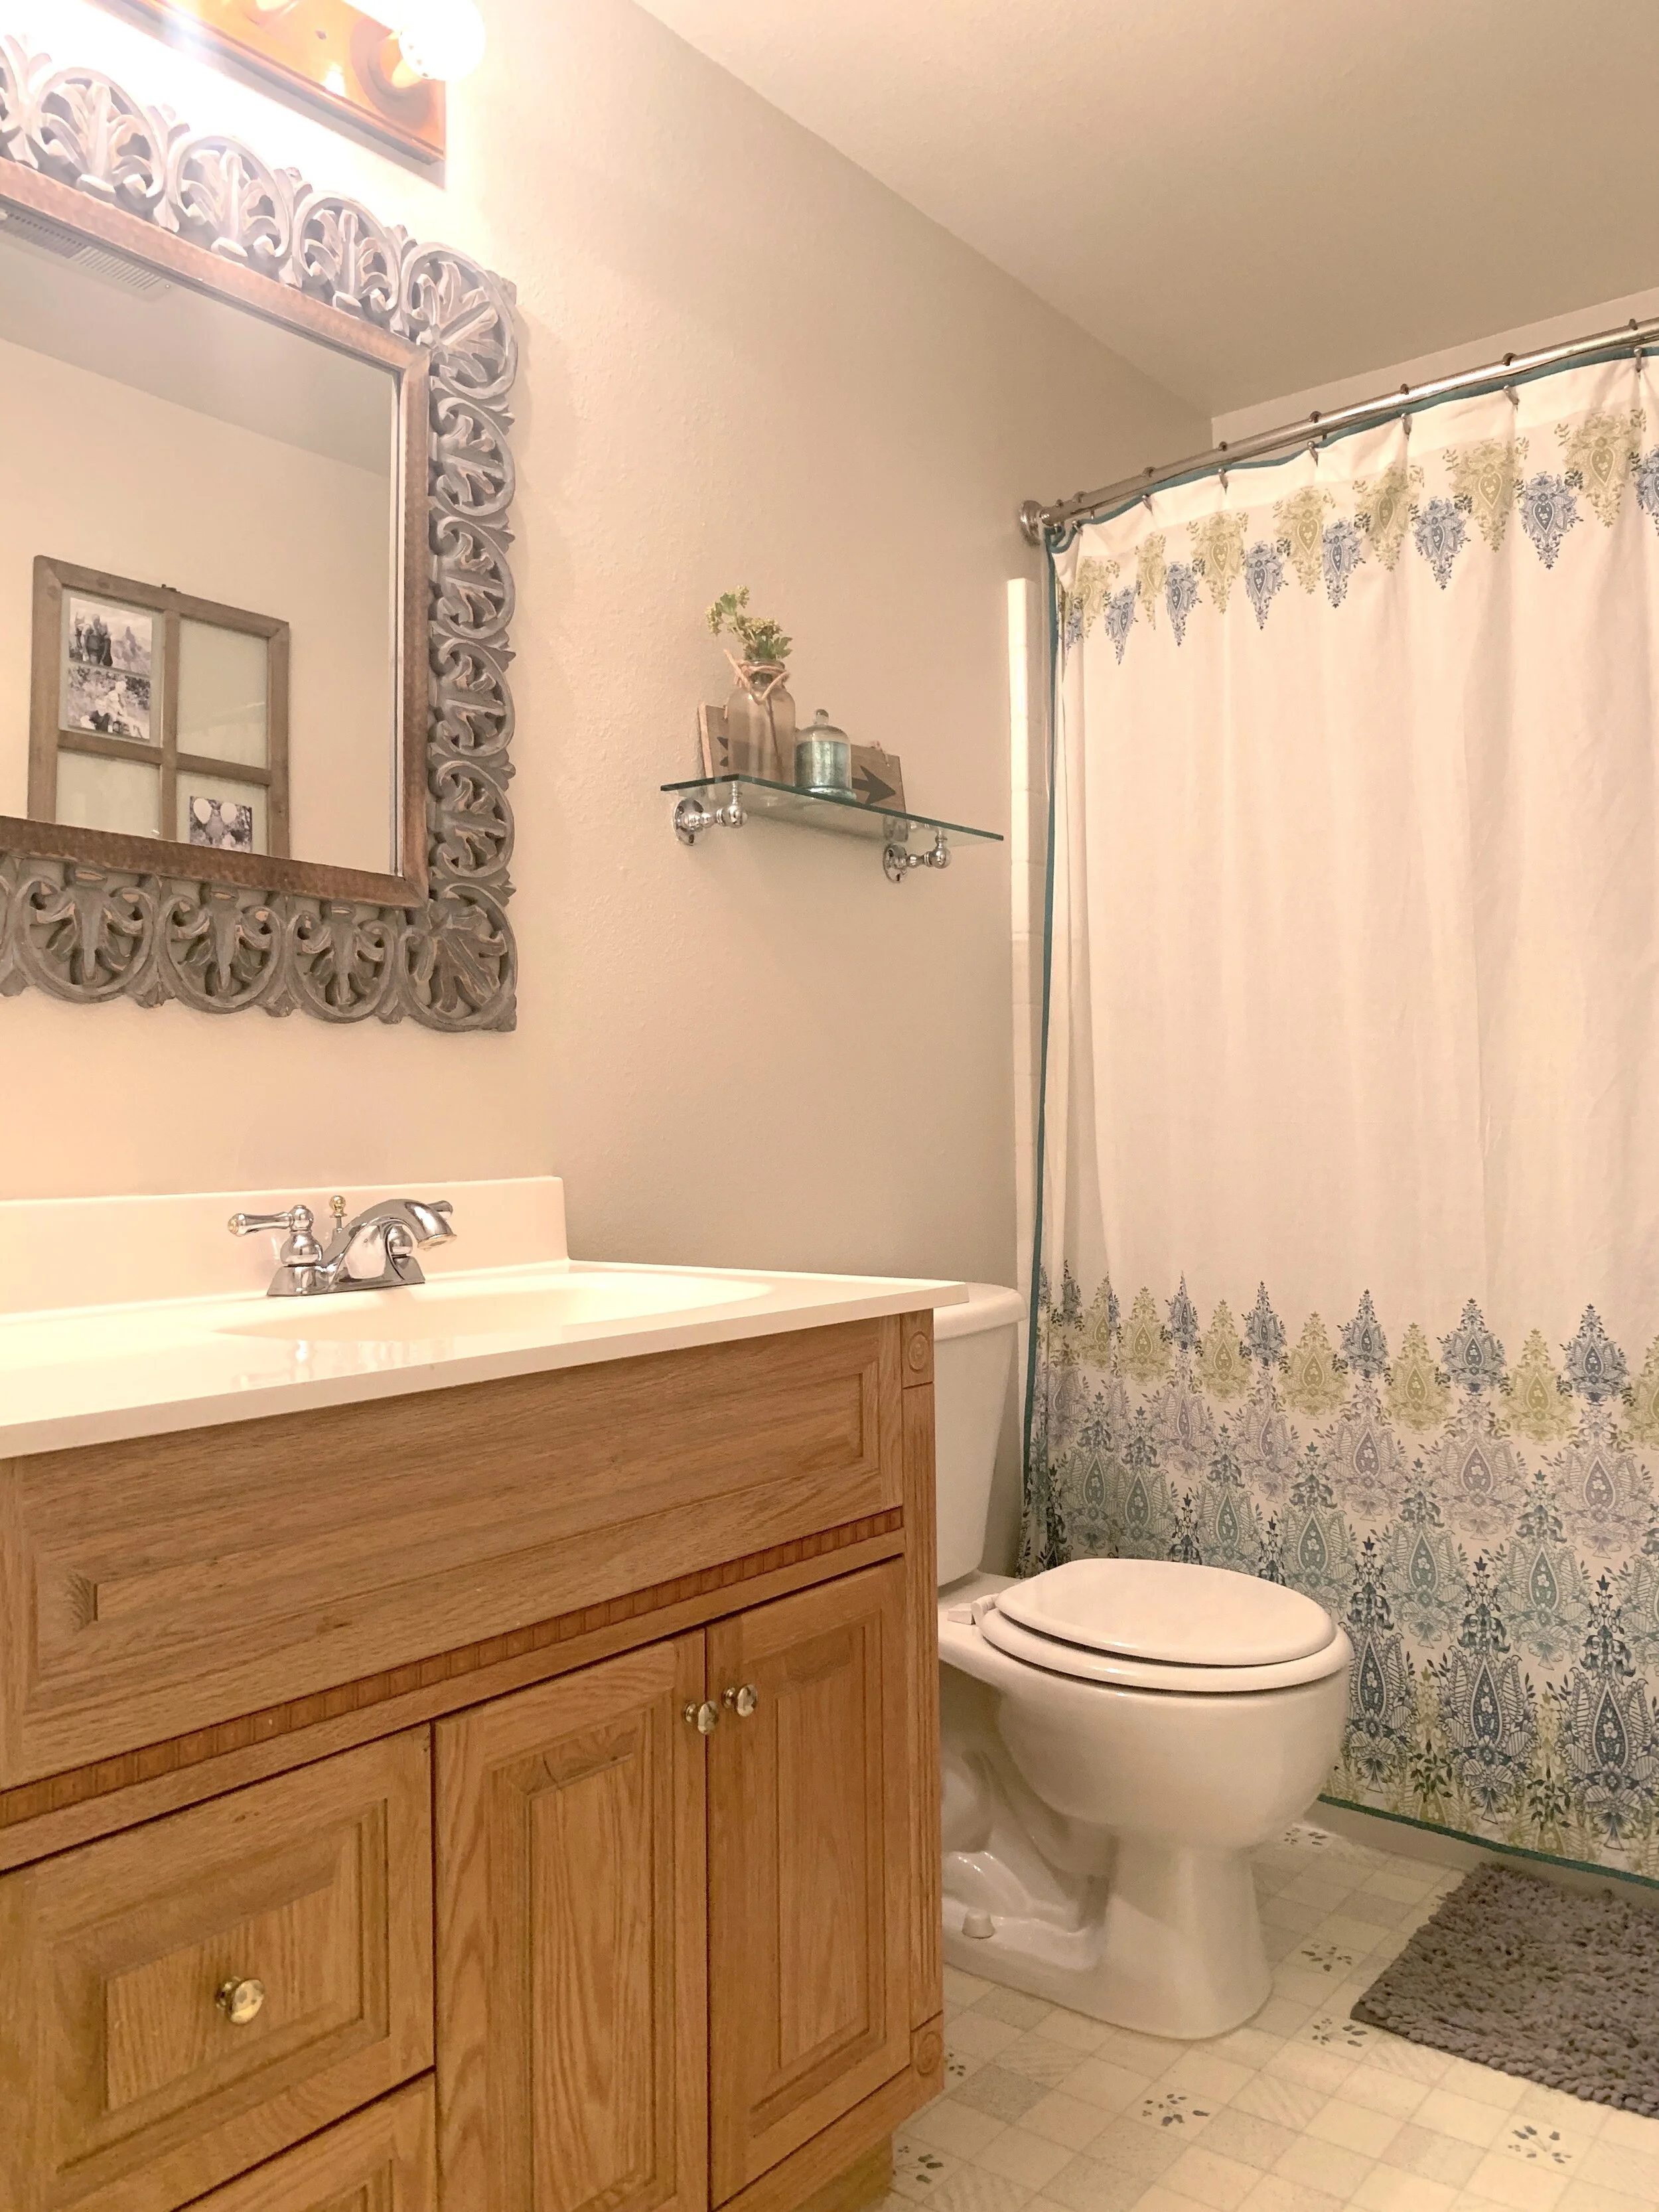
The before:
Let’s just take a minute to look back where this little bathroom started. When we moved in, I knew it wouldn’t get much use being in the basement. Functionally it was great, so it wasn’t at the top of our remodel list. Plus, there was something fun about keeping it’s original look for a while.
Having known that three young girls grew up sharing that space made it feel a bit nostalgic and special. I wasn’t ready to let go of that just yet.
Instead, I tried to find a few accessories that coordinated with the existing floor and color scheme. I’m a huge fan of the bohemian style, so I gathered my bathroom essentials at Cost Plus and tried to keep it simple but fun.
Fast forward 5 years and it’s demo time!
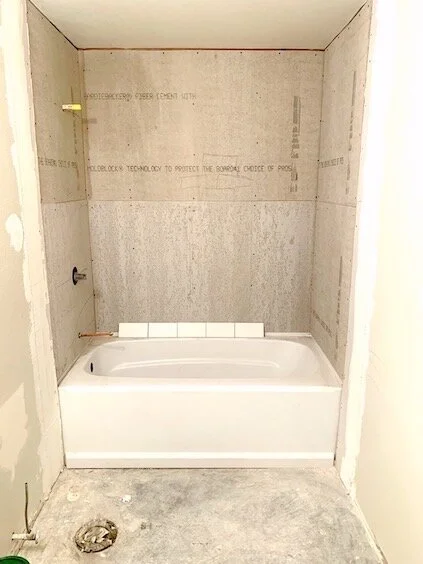
Knowing that this bathroom would now be inhabited mainly by my teenage son, I wanted to keep the style neutral but still flow with the rest of the house. I really wanted a full glass walk-in shower, but I quickly crossed that off the list for two reasons: 1) cost 2) no teenage kid is going to keep a wall of glass clean long term.
Instead we opted for an alcove tub. It’s a slide in tub that allows for the addition of wall tile on three sides, making it look more like a built-in custom tub than a full fiberglass tub/shower we had before. It was a simple, affordable fix perfect for a teenage kid. See the before and after pics below.

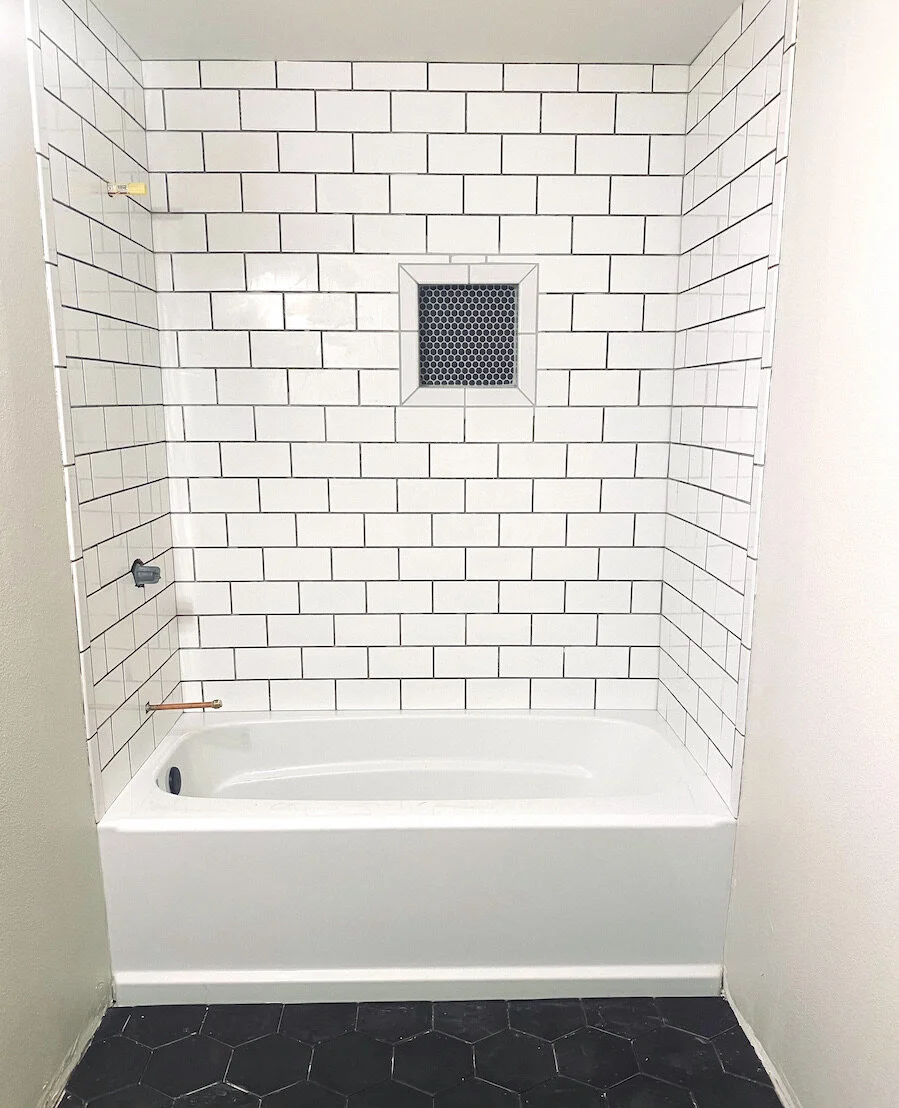
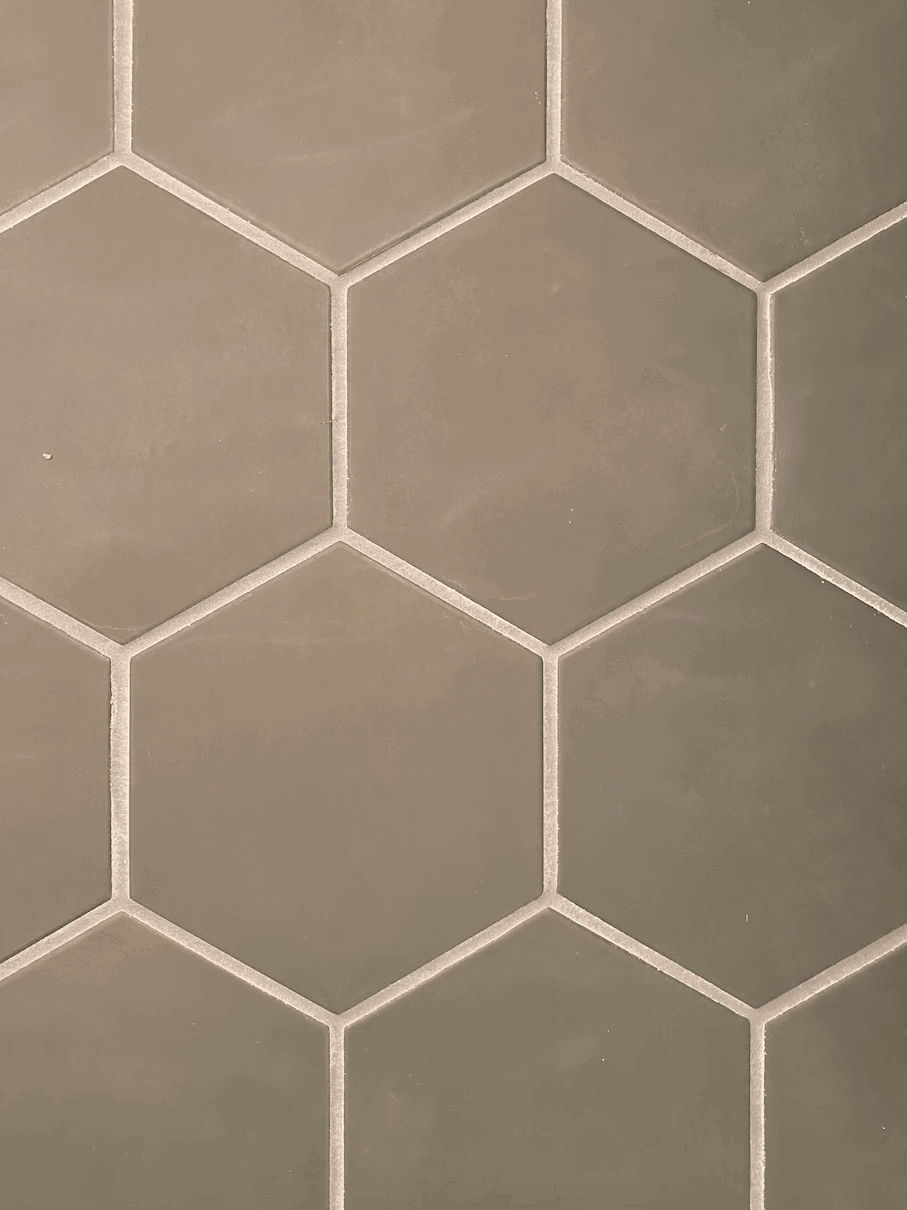
Hexagonal floor tile
The next step was the floor tile. Hex tile is my new flooring obsession, and I couldn’t wait to incorporate it into this space. I knew it would be the perfect ‘manly touch’ but also be simple enough to not take over the tiny space. I waffled a bit with grout color, but finally settled on dark gray for a slight contrast. I LOVE how it turned out. Now I just hope my son can keep it clean!
I purchased my hex tiles at Lowe’s. They’re Satori Nouveau 7x7” hexagon tiles. Click here for a direct link to them on Lowe’s website.
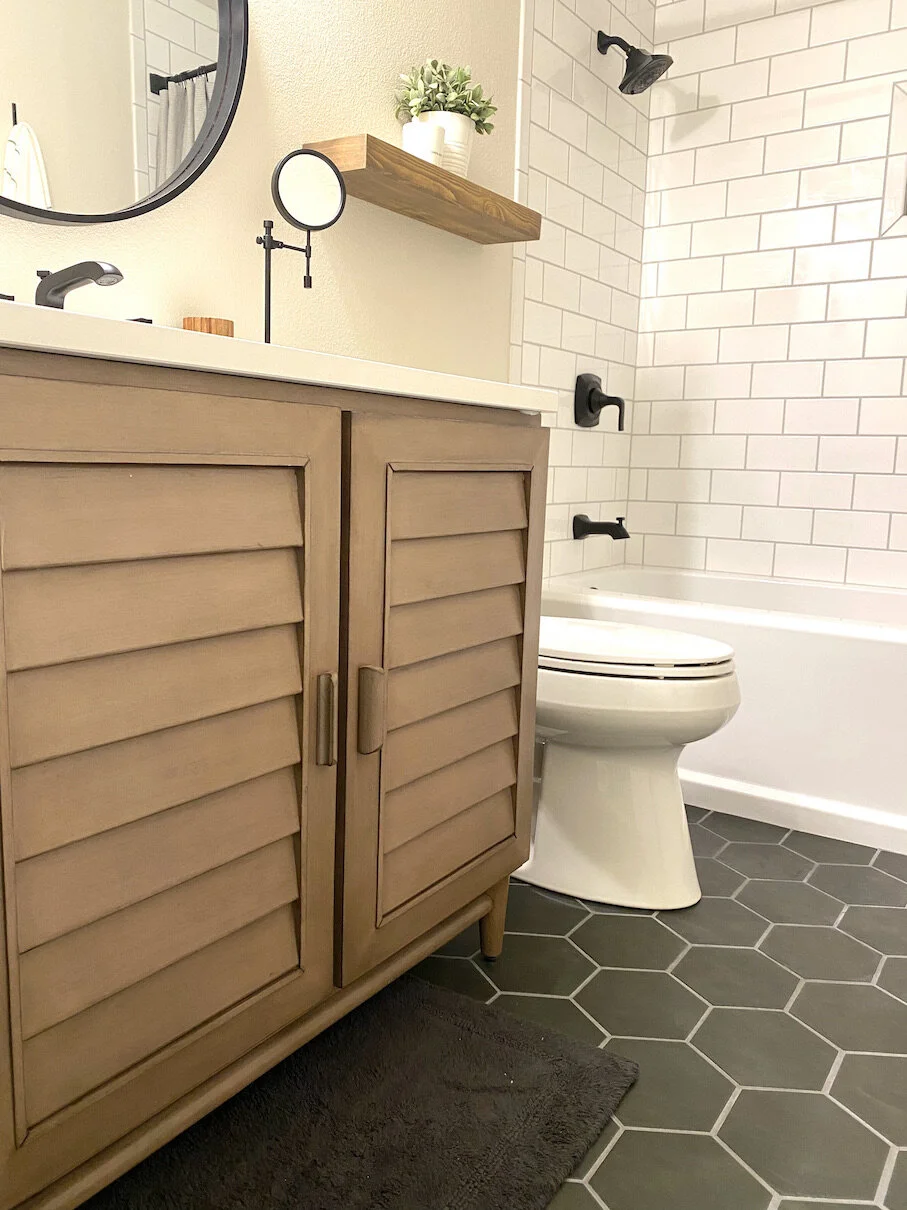
Next was the vanity. After scouring the internet for days, I finally settled on this beauty (pictured above). I love the clean lines and simple cabinet style. The bathroom’s previous vanity was 36” long which was tight but I thought it fit the space pretty well, and I wanted the extra storage. So, I stuck with the 36” vanity but chose a more simple cabinet style (with hidden drawers inside).
I have used Vanities Depot (online) for the past few bathroom remodels, and have been very pleased, so I ordered from them again. They’re great for picky people like me. With a great selection, competitive prices and lots of options to choose from, you’re bound to find exactly what you’re looking for. You can be directly linked to the vanity I chose by clicking here, or see the detailed info below.
Vanity details:
36” Portland Whitewashed Walnut vanity
White Silestone quartz white countertop & undercount sink
I chose the three hole faucet option, but there is a one hole option too
Finally, it’s time for the accessories and decor! This is by far my favorite part of a remodel. It’s like the sweet, tasty icing on the cake, only in a bathroom… ok, sorry, terrible analogy.
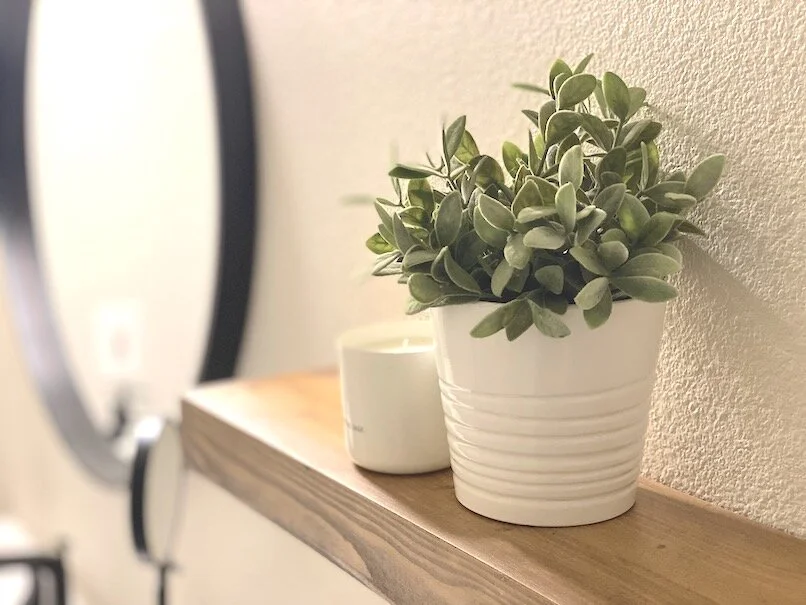
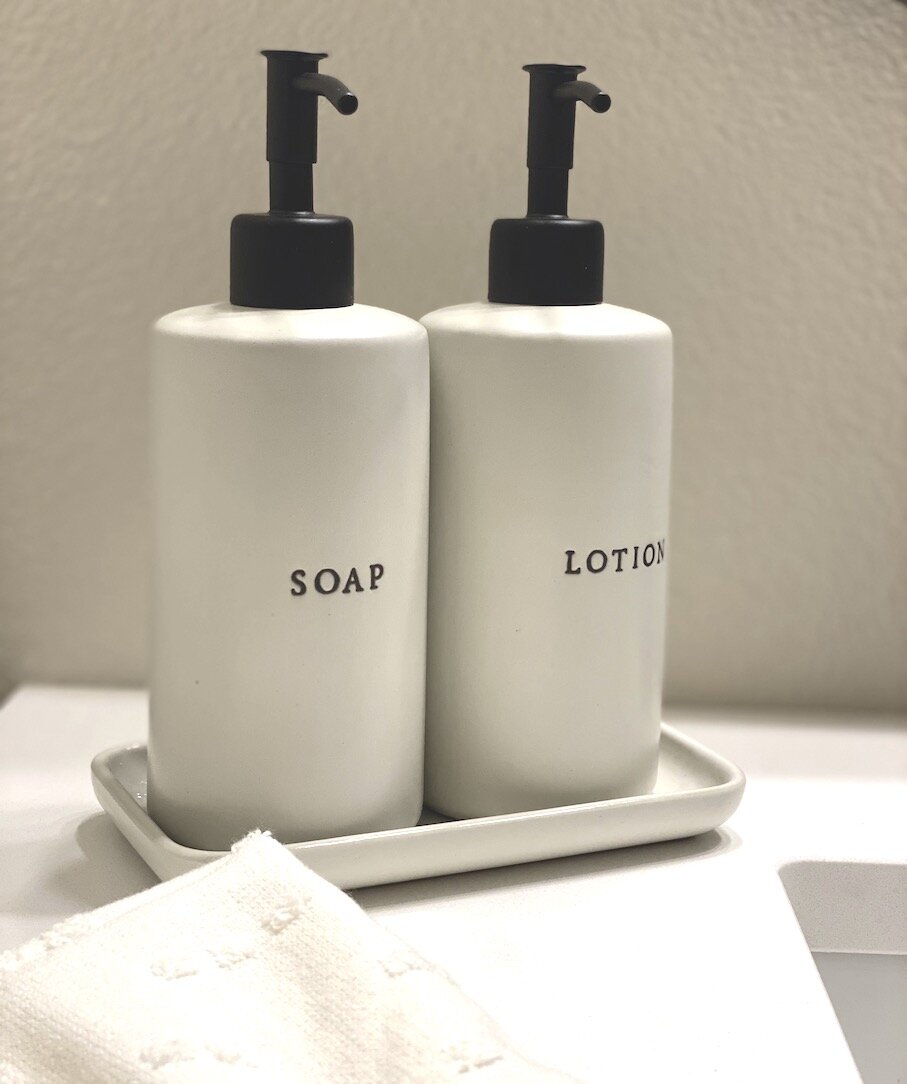
Anyway, I wanted to keep the style clean and ‘dude friendly’, so I chose a neutral black/cream color palette. Like always, I trusted Joanna Gaines and Target to provide me with a plethora of great products to choose from. I originally picked thick, dark gray woven bath towels, but they were way too simple and matched the floors too perfectly, so I exchanged them. Ultimately I settled on Joanna’s Hearth and Hand gray and white striped towels. I love the texture they added to the space, and they were a perfect compliment to the floors, just as I hoped they would be.

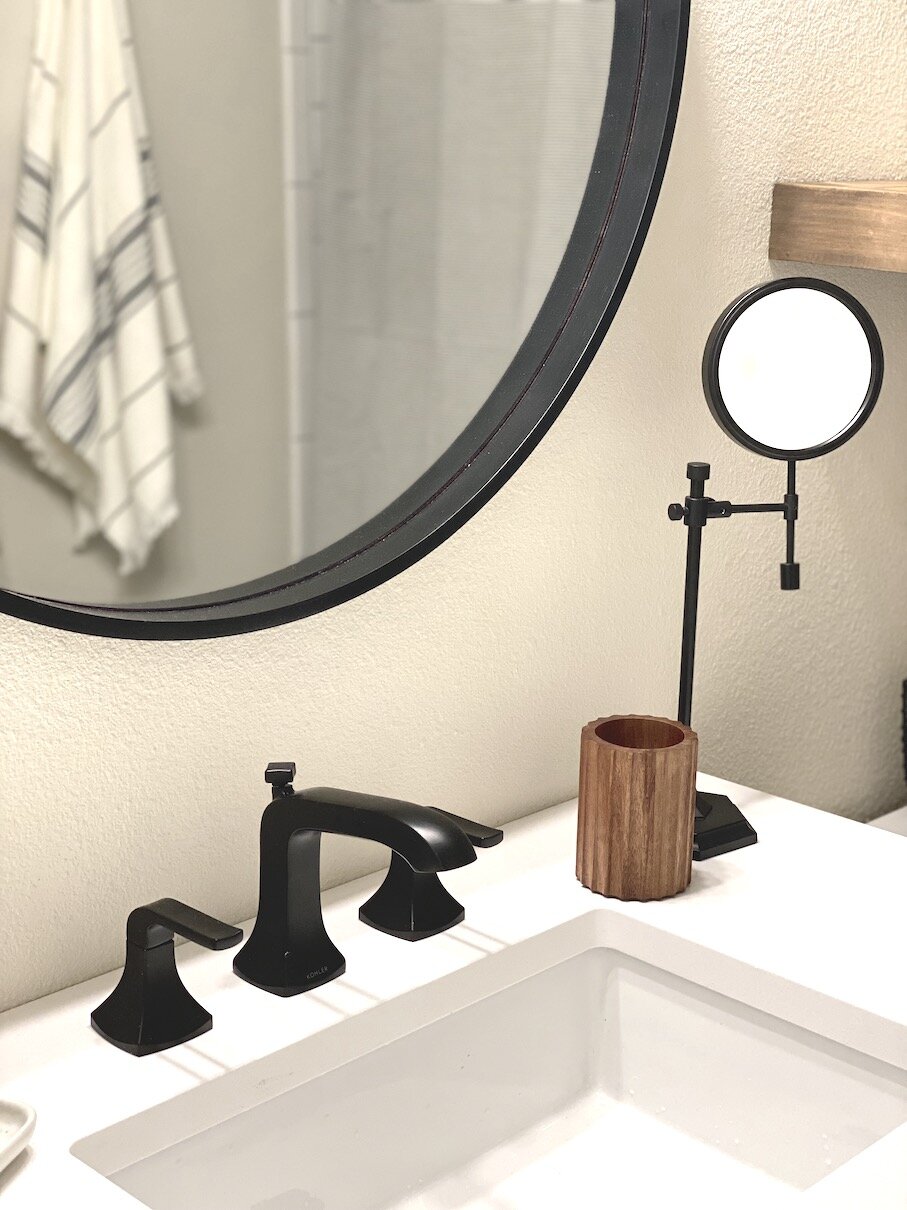
As with any design project, I like to throw in a touch of something vintage. For this room I chose a vintage (inspired) hand mirror that resembles the cool old barber shop mirrors used back in the good ol’ days. It wasn’t actually old, but I think it really gives the space a fun feel, and what high school kid doesn’t want more mirrors to check themselves out in?!
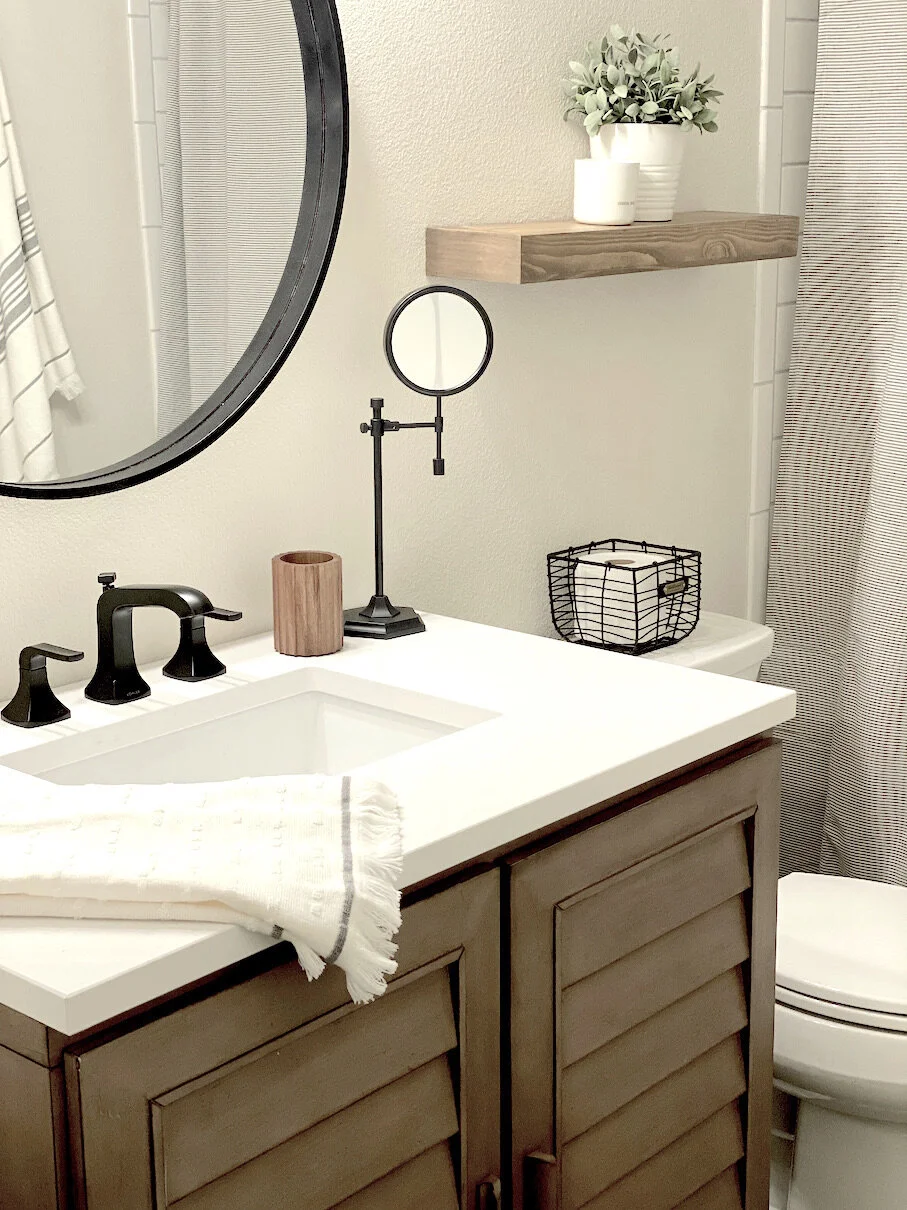
The round mirror was also purchased from Target, but it was originally wood colored. Once I got it in to the space I decided it needed to be black, so I spray painted it. Sounds kind of complicated, but I assure you it was very simple: I lined the edge of the mirror with painters tape and used a razor blade to cut around the edge of the mirror where the wood meets the glass. After removing the extra tape that covered the wood frame, I covered the rest of of the mirror with cardboard to avoid it getting painted on. I then used a can of matte black spray paint, and with a back and forth motion, painted the wood portion of the mirror. Once it was dry I carefully removed the tape and voila! Easy peasy!
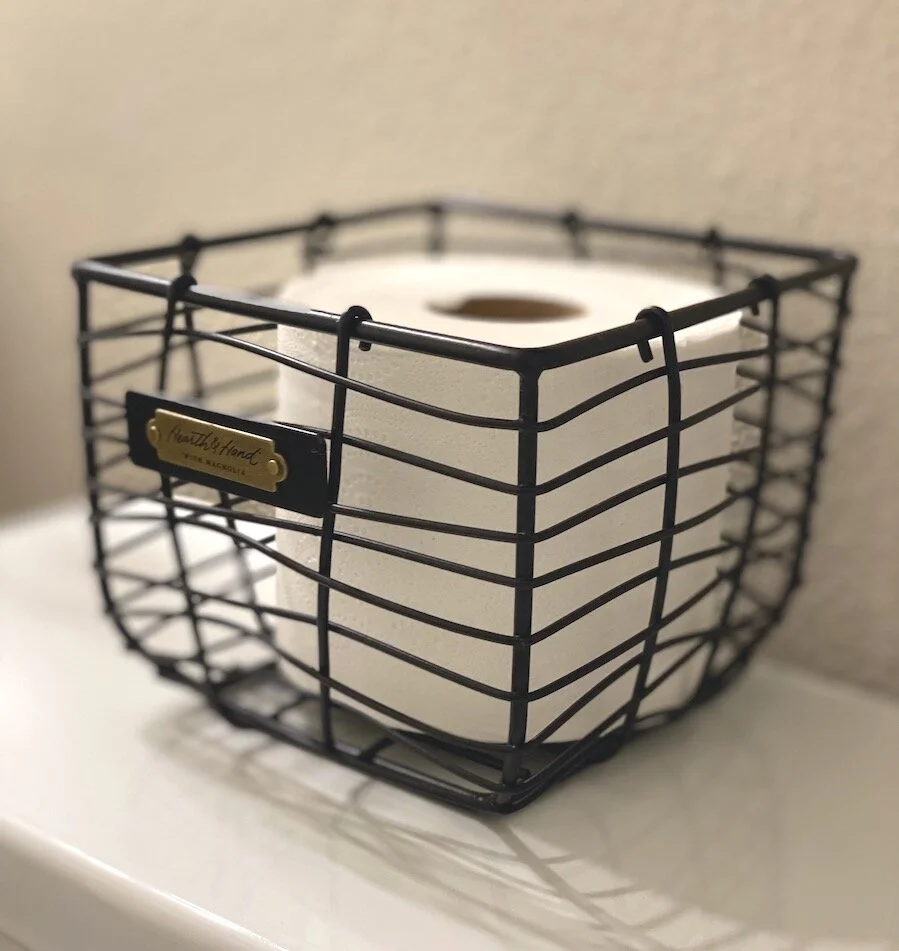
I have included the other accessories, towels and shower curtain below. Simply click on any of the photos and you’ll be linked directly to them on Target’s website.

In all, I’m SO happy with how this little bathroom turned out. It’s now the perfect space for a teenage kid (or anyone else who finds themselves lost in our basement).
If you have any specific questions about this project that I forgot to mention, please feel free to email me. I’d be happy to answer any questions you might have: jennnika@fleurisheddesignstudio.com
Or, if you’re considering a future remodel and need some advice or help choosing products, I’d love to help! Simply visit the services page on this website and schedule a design consultation. It’s a simple way to get help with all the tough questions and decisions you have to make when starting a new project.
Thanks for taking the time to read this post, and I hope it inspires you!
Happy (future) remodeling,
