DIY Holiday Doormat
A fun, simple, budget friendly way to adorn any front porch for the holidays!
Entryways, especially during the holidays, are a great way to add an extra level of coziness to your home and help your guests feel welcome. Doormats are a simple way to add an additional layer of fun without spending much to do so. This DIY project is simple and creative, but it’s also customizable and very budget friendly!
Perhaps you’re stumped on what to get a good friend or loved one this holiday season? This just might be the perfect gift! The doormat shown below took me approx. 40 minutes to complete and I spent less than $20! Win, win!
Whether you make this for your own front entryway or for a good friends’, I assure you it will set the tone for a fun, festive holiday ahead for all who step upon it!
Here’s what you’ll need:
A natural fiber coir doormat
I prefer the mats with non-stick bottoms, but you can get them without as well. I picked mine up at Home Depot, here, but you can find them at nearly any home improvement or craft store. * If you get one at Joanne’s or Hobby Lobby, be sure to use the online coupon.
Flat end foam brushes
I purchased a pack with three different sizes of brushes just in case. You can probably get away with only one brush, depending on the complexity of your design, but a few extras might be a good idea. I got mine here at Joanne’s.
Stencils
You can buy a set in the style of your choice or make your own. I knew I wanted the letters in my wording to be compact, and that wasn’t possible with individual stencils, so I decided to make my own. All you need is a printer, a few sheets of thick, cardstock paper and an xacto knife. (Instructions below)
Note: If you do buy stencils, you’ll need to know that they aren’t measured by the size of the letter, but they include the border as well. For example, if you order a set of 4” stencils, the letters will actually be more like 3” in size.
Folk Outdoor acrylic paint
I highly recommend the outdoor acrylic paint as opposed to the regular acrylic. It will hold up much better outdoors and is a thicker consistency, which will lend itself perfectly to the nature of this project.
Sewing pins or push pins
Any pins will work. They will get completely covered in paint, so make sure they’re ones you’re willing to part with.
Stumped on a saying?
Here are a few fun ideas:
jingle all the way
happy holidays
holly jolly
ho ho ho
merry everything
hope you brought wine
hello.
life is good
hey there
probably out shopping
beware of kids
Step #1:
Choose your saying. If you already have stencils, skip to step #2. If you’re making your own stencil, follow these steps:
Type your saying in the font & size of your choice on your computer in any document formatting software such as Word or Pages. Experiment with different fonts and sizes until you find what looks best.
Once it’s perfect, print it out on a sheet of thick cardstock paper.
Note: I used the font DIN Condensed Bold in 250 pt type. It wouldn’t fit on one 8.5 x 11 sheet so I had to divide it between two sheets.
Next, cut out the black letters with an xacto knife, making sure to keep the inner portions of necessary letters (like the inside of the B & R). See image to the left.
Step #2
Lay your stencil out on your doormat in the desired location and secure it in place with push pins.
Be sure to pin down the edges of the paper as well.
Step #3
Carefully dab the mat in a straight up and down motion with a little bit of paint. Too much paint and it will seep under the stencil. Too little and it will not show up on the mat. It’s best to err on the side of caution. You can always go over it again if necessary.
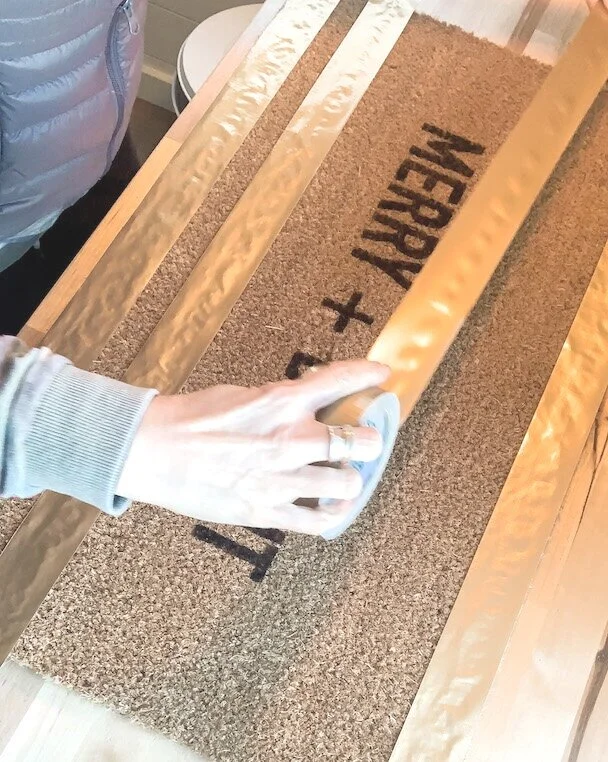
If you want to create a border like I did (shown at right), I found it’s easiest with duct tape. Simply pat it down in the desired areas and dab on the paint just as you did with the letters.
Step #4
Once your letters are all covered in paint, leave it for at least 24 hours to ensure ample drying time. Then you can carefully remove your stencils (and tape) to reveal your painted letters.
If necessary, use a small sponge brush (or paintbrush) to go over any areas you may have missed. Then let dry completely before setting it out.
Now all you have to do is set it on your door step and admire your handy work!!
Happy Holidays!


